Getting to Know EZ-Rod Systems
If you’ve been reading our blog for a while, you know we’re big fans of rod and wire systems. They’re strong, simple to use and add a huge amount of style to a project. If you want a nice architectural touch, it’s hard to beat rod and wire. You already know your way around turnbuckles (if not, check out last week’s post) so you’ll have no problem making sense of a rod system’s components. Keep in mind that a wire system works the same way.
 First, you’ll need to attach your system to a surface. You can mount an assembly directly to the surface or start with a base plate – it’s a matter of aesthetic preference and available space. In this case, we’ll hold our base plate to the surface with normal screws and pass a low-head screw through the center hole to attach to the rod mount.
 There are straight, angled and adjustable rod mounts so you can mount to horizontal or vertical surfaces and run your rod parallel, perpendicular or at an angle to that surface. This mount houses an internal turnbuckle to allow you to apply tension to the system. It’s a good idea to put your turnbuckle on the bottom.
 Up top, you can use a standard rod mount with or without a base plate. Top or bottom, base plate or not, you’ll use a small set screw to hold the rod end tight.
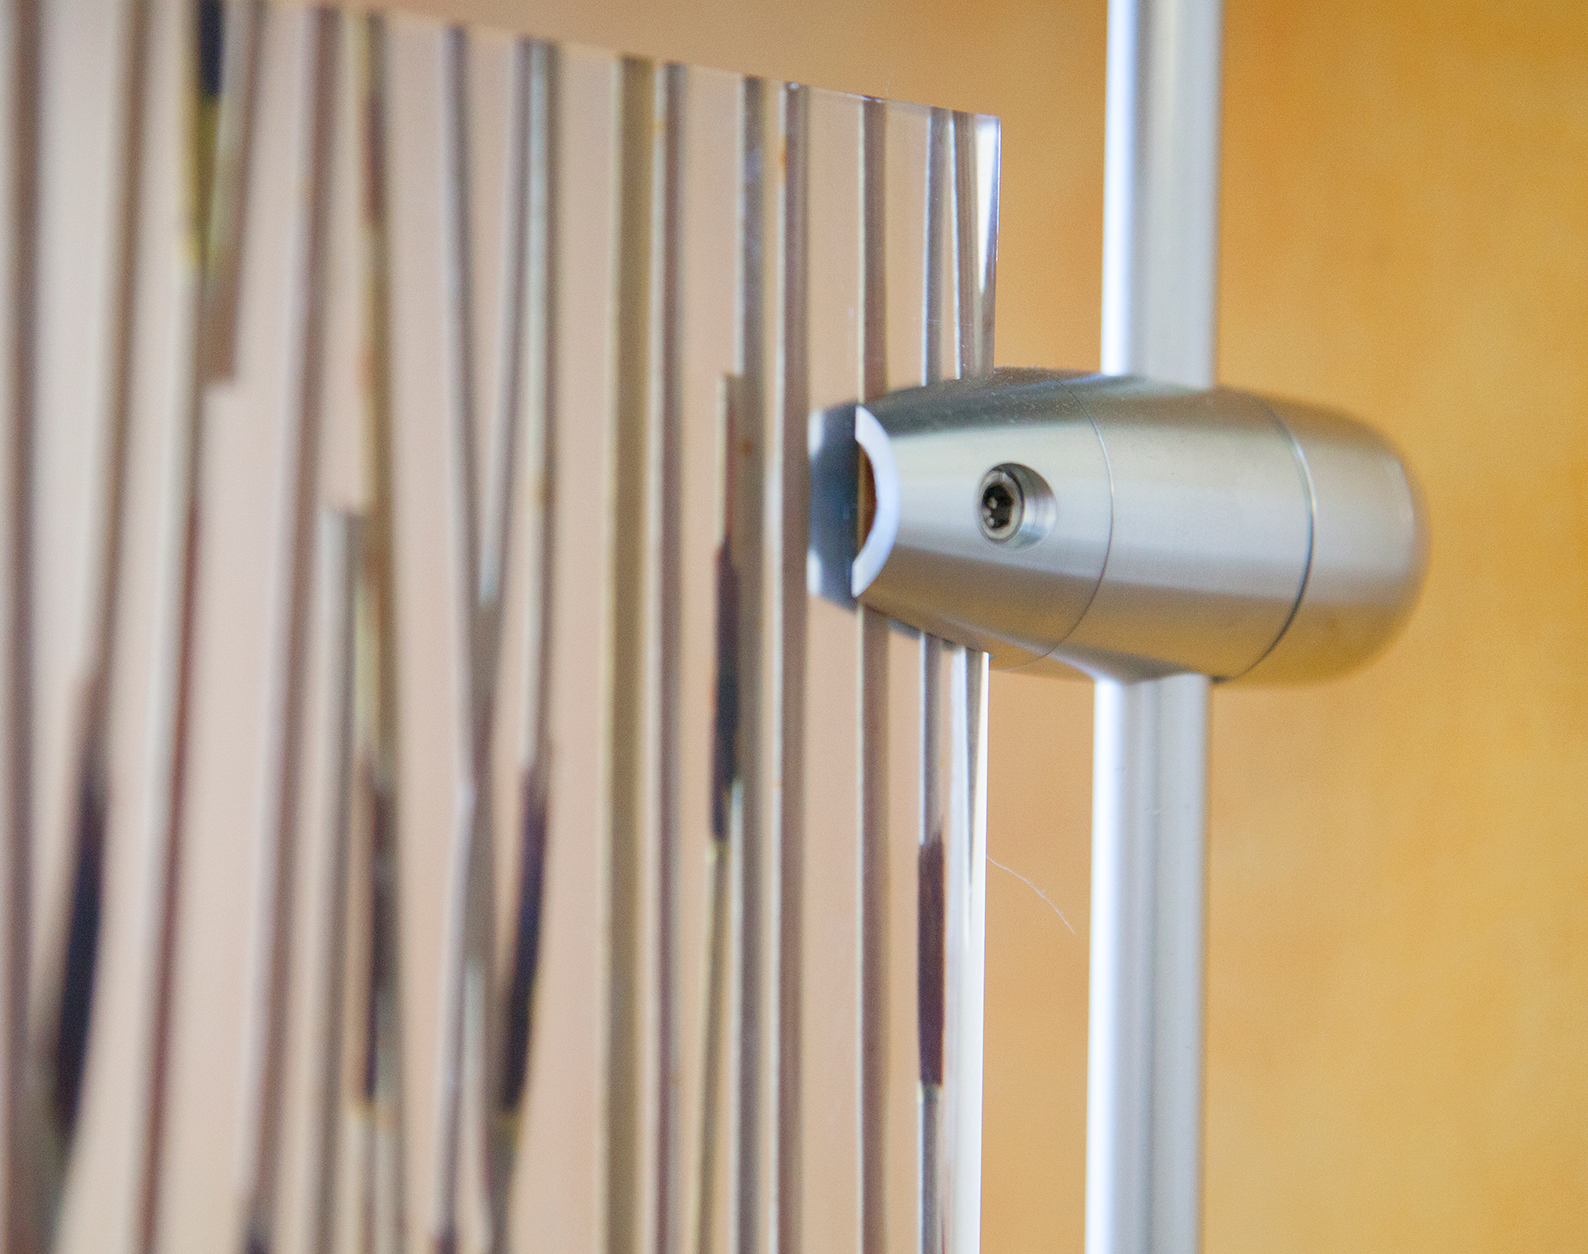 Once your rods are in place you can start attaching grippers, clips and standoffs. Some connectors and travelers will need to be installed before you attach the ends of the rod, so it’s important to know how your hardware attaches before you start. Once everything is in place, just tighten the set screws like you would with a rod or wire mount.
That’s it! Rod systems are easy to install and look great. Take a shot with your next design and don’t forget to send us pictures of your finished project.