How to Install HTUBE
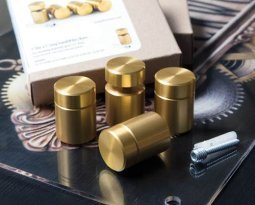
 The HTUBE anchoring system creates a strong base mount with minimal space requirements and a clean, finished look. HTUBE can be shipped with holes drilled and tapped to your specifications and custom machinery ensures that attachment points are correctly placed. Use this system to build dividing walls, mount display panels or install signage.
 To begin, install the anchor using appropriate hardware. Client Solutions Specialists can help determine the best way to join the anchor to your floor. It’s important to make sure your anchor is level before moving on to the next step, and shimming may be necessary to compensate for an uneven floor.
 Connect the HTUBE to the anchored base mount using three button head screws.
 Use low head screws to mount your chosen hardware to the HTUBE. In this case, the hardware is a series of EZ grippers used to mount acrylic panels. The holes for this hardware can be drilled and tapped at precise, pre-determined points to ensure your material is mounted at the correct angles. This process can also be done at the job site using a drill and hand tap.
 Finish off the top of the HTUBE by installing the cap. This piece fits snugly into the tube with a rubber o-ring and can easily be fitted by hand.
 The completed installation results in a simple, elegant dividing wall with minimal visible hardware. Explore the possibilities and learn how HTUBE can make your next installation a success. For more information on HTUBE installation, watch the video tutorial below.